

An endoscope can be manually cleaned and still have a working channel nobody has actually seen. An endoscope channel inspection camera puts a view inside that lumen before the device moves to high-level disinfection or sterilization, helping sterile processing teams look for retained debris, moisture, scratches and internal damage that external inspection cannot show.
Three things decide whether that inspection is useful: when the camera is used, whether the scope actually fits the channel, and whether staff know what to do with the finding. Get those right first. The product choice becomes much easier after that.
Use an endoscope inspection camera when direct sight cannot verify the inside of a working channel or lumen after manual cleaning. Match scope diameter and length to the device, inspect at the correct point in the reprocessing workflow, and follow the device IFU and facility procedure when debris, moisture or damage is found.
Why Manual Cleaning Still Leaves a Blind Spot
A flexible endoscope can look clean from the outside while the internal channel remains completely out of view. Brushing and flushing are process steps. They do not give the technician a direct look at the full internal surface.
That is the gap an endoscope inspection camera or endoscope borescope is meant to close. The tool brings light and imaging into the channel so the technician can inspect areas that would otherwise stay hidden.
For a quick terminology breakdown, see Endoscope vs Borescope: What's the Difference?
Published borescope studies have documented scratches, channel shredding, retained debris, staining and fluid inside inspected channels. One pilot study reported scratches in 86% of inspections, channel shredding in 59% and intrachannel debris in 23%. Those percentages belong to that study population, not every department, but they show why internal visual inspection can reveal conditions that an external check cannot.
A borescope can show that material, moisture or surface damage is present. The image alone cannot prove sterility or identify visible material as biofilm. Treat the image as visual evidence that guides the next step in the facility procedure.
Where Channel Inspection Fits After Manual Cleaning
The timing matters. CDC guidance places visual inspection after manual cleaning and before high-level disinfection or sterilization. AORN also discusses borescope inspection as part of a broader inspection and cleaning-verification program.
The practical workflow looks like this:
Brush, flush and clean according to the device manufacturer's IFU.
Check accessible external areas and use a clean borescope for accessible internal channels.
Use the facility's approved cleaning-verification process when required.
Reclean, document or remove the device from service according to the finding and procedure.
Move to HLD or sterilization only after the required checks are complete.
Do not write "borescope after cleaning" into a department procedure without defining what happens next. Staff need a clear rule for visible soil, retained moisture, suspected damage and uncertain findings before the first inspection starts.
What You May See Inside an Endoscope Channel
The useful question is not whether the image looks unusual. It is whether the condition should trigger recleaning, documentation, repair evaluation or another action under the facility procedure.
This is also why staff training matters. Two technicians can see the same mark and describe it differently if the department has not agreed on examples, terminology and escalation rules.
Pre-Selection Checklist: Channel, Length and Workflow
Choose the endoscope channel inspection camera around the devices you actually reprocess. The smallest lumen and longest channel usually remove more options than brand names or screen size.
- Smallest lumen: record the smallest channel inner diameter the scope must enter.
- Longest channel: confirm whether the job needs 80 cm, 100 cm or a longer single pass.
- Device list: separate flexible endoscopes, bronchoscopes, shavers, suction tubes and other cannulated instruments.
- Image workflow: decide whether the team needs live viewing only or saved stills and video.
- Inspection station: confirm whether a dedicated monitor or a Windows PC/tablet fits the room better.
- Scope reprocessing: confirm how the inspection scope itself will be cleaned or disinfected between uses.
- Interpretation: define who reviews findings and what conditions require escalation.
- Documentation: decide how images will be named, stored and tied back to the device or inspection event.
Build a one-page device list before you request a quote. Put the device family, smallest lumen and channel length on it. That sheet usually tells you whether one inspection scope can cover the department or whether you need more than one diameter.
Fiberscope vs Videoscope for Endoscope Channel Inspection
For very small lumens, an optical fiberscope can reach places a larger digital camera cannot. Where the channel allows it, a CMOS videoscope can give the technician a direct digital image and a different documentation workflow.
Neither technology is automatically better. Access decides first.
Matching EndoInspect to the Inspection
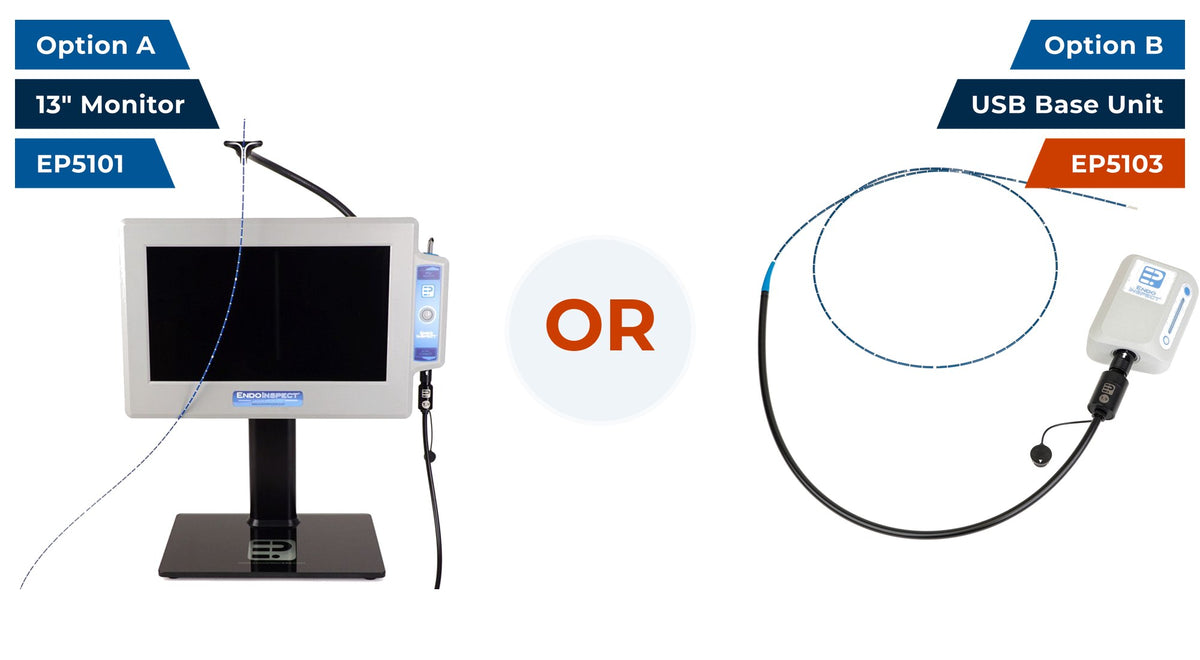
One Platform, Several Lumen Sizes
EndoInspect is built for visual inspection of medical-device lumens and working channels during reprocessing. It is not for patient use. One base accepts multiple scope diameters, so the configuration can be built around the device list instead of forcing one probe into every lumen.
The current family includes 0.5 mm and 0.8 mm fiberscopes plus 1.0 mm and 1.9 mm CMOS videoscopes. The videoscope family includes 100 cm and 190 cm lengths, while the fiberscopes are 80 cm.
What an Endoscope Inspection Camera Does Not Replace
Visual inspection adds information that the unaided eye cannot get from inside the channel. It still has limits.
A clear-looking channel does not prove microbiological cleanliness or sterility. A visible mark does not automatically tell you whether the cause is residue, wear, damage or another condition. And the camera does not replace the device manufacturer's IFU, the facility's cleaning-verification process or other required reprocessing controls.
EndoInspect is also not a patient-use endoscope. It is a lumen inspection camera for reprocessing and documentation.
The device IFU, facility policy and applicable professional guidance decide what happens after a finding. The camera gives the team a view and a record. It does not make the acceptance decision by itself.
What to Send AIT Before You Choose a Scope
You do not need to know the EndoInspect part number first. Send the application details and let the configuration come from the channel.
- Smallest channel inner diameter the scope must enter
- Longest channel and whether a 190 cm single pass is needed
- Device types in scope: flexible endoscopes, bronchoscopes, shavers, suction tubes or other cannulated instruments
- Where inspection will happen in the department and whether the area is wet/decontam
- Whether a Windows PC or full-Windows tablet is available at the inspection point
- Whether optional HLD of the inspection scope is part of the workflow
Key Takeaways
- Manual cleaning and direct visual access are different things. The working channel can remain out of sight after cleaning.
- Use the borescope at the correct point in the reprocessing workflow and define the action for debris, moisture and suspected damage before the program starts.
- Choose the inspection scope from the smallest lumen, longest channel, image needs and documentation workflow.
- Fiberscopes solve smaller-access problems. Videoscopes fit larger channels where direct digital imaging and documentation are useful.
- EndoInspect covers 0.5 mm to 1.9 mm scope diameters across fiberscope and CMOS videoscope configurations.
- Visual inspection supports cleaning verification. It does not prove sterility or replace the device IFU and required reprocessing controls.


