

Fiberscope care and maintenance protects the glass-fiber image bundle, illumination path and flexible insertion tube that make inspection through a narrow opening possible. A clean eyepiece can restore a cloudy view; a damaged fiber bundle may not. Knowing the difference helps a maintenance team decide whether to clean, request a repair evaluation, rent a replacement or move to another inspection system.
Many fiberscopes fail through everyday handling rather than a single obvious accident. Tight bends, pulling against obstructions, unapproved chemicals and damp storage can shorten the useful life of a scope. The consequences are especially noticeable in precision inspection, where an obscured detail can mean repeating a job or losing the chance to document a component.
This article focuses on what to do when an optical fiberscope starts to show wear, not a generic borescope routine. For a closer look at the imaging technology itself, see AIT's explanation of how a fiberscope works.
Quick answer: Inspect the image, eyepiece, illumination and insertion tube before use; avoid force and tight bends; clean only by the approved method; and store the scope dry in its fitted case. If fixed dark spots, tube damage or control problems persist after basic checks, stop using the scope and arrange an evaluation before the next inspection.
What Makes Fiberscope Damage Different From Ordinary Dirt?
An optical fiberscope carries its image through a coherent bundle of many small fibers. These fibers must stay intact and correctly positioned to transmit a usable picture. Wiping the lens can remove contamination, but it cannot reconnect a fractured image fiber. The same principle applies to the separate illumination path: a clean outer lens will not fix a damaged light bundle.
Fixed black specks or clusters can indicate broken image fibers. They may remain visible as the scene changes, unlike ordinary debris on the inspected part.
Crushing, kinks, cuts and sharp folds can affect the optical bundle even when the fiberscope still produces an image.
A contaminated tip, a light-source problem or damaged illumination fibers can make the inspection field too dark to evaluate reliably.
Dark spots alone do not prove that every fiber in the bundle is broken. Check the eyepiece and optical surfaces first, then compare the view against an evenly illuminated target. A pattern that remains fixed after approved cleaning warrants closer evaluation. See how fiberscope bend radius affects fiber integrity when the damage follows a difficult route.
How to Care for a Fiberscope During Real Inspection Work
For an industrial fiberscope, the most effective maintenance happens around each inspection rather than during a major service interval. The goal is to keep the probe out of damaging conditions and confirm that the image is usable before the component is reassembled or returned to service.
Look for damaged sheathing, a loose eyepiece, contaminated optics and changes in light output. Verify that the route and bends suit the probe instead of assuming that a small diameter guarantees access.
Feed and withdraw gently. Protect sharp entry edges, avoid twisting against resistance and keep broad curves in the unsupported working length. Do not leave the scope unattended in the component.
Use only a manufacturer-approved cleaning method for the specific scope and contamination. Dry permitted surfaces, secure the eyepiece and light connection, then arrange the probe without tight coils in its fitted case.
A useful distinction: A probe's resistance to water or chemicals does not automatically extend to its eyepiece, handle, connectors or complete system. The older advice to use household window cleaner or treat every fiberscope as safe to 80°C should not be applied as a general rule; confirm the limits for the exact instrument.
For shared inspection equipment, the strongest practical habit is to examine the image on a consistent reference surface before and after each job. When the same region of the view becomes darker over time, the team has evidence of deterioration instead of discovering it midway through the next inspection.
Is the Fiberscope Dirty, Damaged or Ready for Repair?
Symptoms help determine the next step, but none should be diagnosed by appearance alone. The table separates issues that may respond to approved cleaning from conditions that call for a qualified evaluation.
An image can remain visible even when the instrument is unsuitable for the next job. This matters in aerospace, power generation, precision machining and other settings where the inspection result must be credible enough to support an equipment decision.
When Cleaning Is Not Enough, Compare Three Practical Options
The decision to repair or replace a fiberscope depends on the damaged component, how much usable image remains, whether the original configuration still meets the inspection, and when the equipment is required again. An optical fiberscope is not automatically obsolete because a digital alternative exists; it may still be the only tool that fits a very small passage.
For an existing instrument, AIT provides a repair and evaluation request route. A quotation or repair decision should follow a condition assessment rather than a promise that all damaged fiber bundles can be restored economically.
Which AIT Inspection System Fits When You Need a Replacement?
Changing equipment can solve an image problem, but only if the replacement also clears the complete inspection route. The Milliscope family offers three distinct options: HDX for steerable micro inspection, HDV for fixed-view digital imaging, and HDF when the smallest fiber-optic access is the deciding factor.
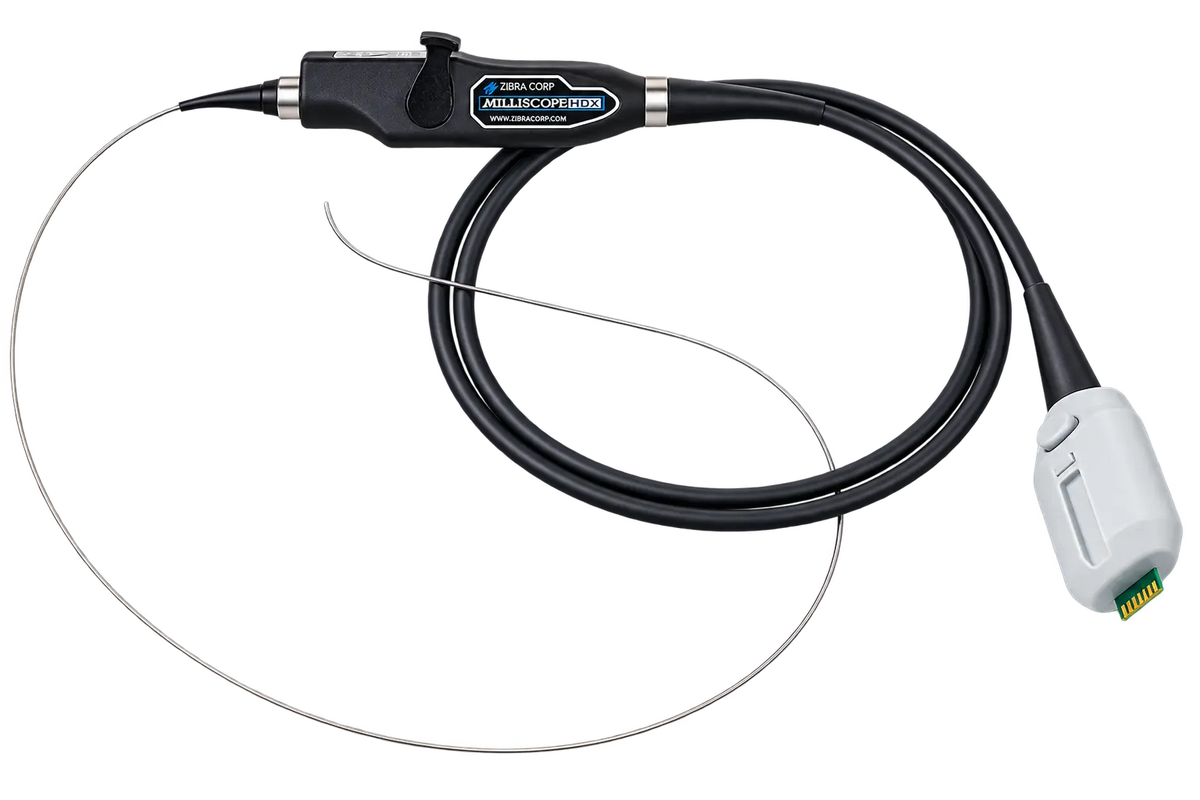
Milliscope HDX Articulating Micro Videoscope
Consider HDX when a damaged fiberscope needs replacing and the next inspection also requires the operator to turn the view toward a hidden feature. Its 1.1 mm and 1.6 mm CMOS probes provide 2-way +/-170° articulation, allowing the distal tip to be redirected after insertion.
HDX is a digital alternative, not a direct substitute for every fiberscope. Confirm the minimum opening, bend geometry, required working length and base-unit compatibility before selecting it.

Milliscope HDV Small Diameter Videoscope
Choose HDV when the target lies along a known viewing direction and direct digital imaging is preferable to a fiber image bundle. Its fixed-view CMOS probes begin at 1.0 mm and support still-image and video recording through the Milliscope HD platform.
HDV can be a practical replacement for routine narrow-passage inspection, but it lacks the HDX's actively steerable distal tip and cannot fit openings that require a sub-1.0 mm fiber-optic probe.

Milliscope HDF Fiberscopes
Stay with HDF fiber-optic imaging when the inspection route cannot accommodate an electronic sensor at the tip. AIT's interchangeable fiberscopes cover 0.35 mm to 3.1 mm diameters, including extremely narrow passages where digital probes may be too large.
HDF is the closest fit when replacing an optical fiberscope that has damaged image fibers but still needs the same small-diameter access. The Milliscope HD camera handle adds illumination, focus and image recording.
For a limited inspection campaign, AIT also lists a Milliscope HD rental option. Confirm the required probe configuration and availability before treating rental as a substitute for a damaged unit. To compare the HDX, HDV and HDF inspection approaches, see AIT's micro borescope selection comparison.
The Next Inspection Should Not Be the First Test
Imagine a fiberscope that worked well at the end of the last shift. It still produces an image today, but a fixed cluster of dark fibers now covers the edge of a narrow passage. The instrument may be able to reach the target while no longer showing the detail that makes the inspection worthwhile.
That is the point where care becomes an equipment decision. A well-maintained optical fiberscope can remain the right tool for years, but keeping an instrument simply because it still displays a picture can cost the team its most valuable asset: confidence in what the next inspection actually shows.


